Just in case you missed my guest feature over at The Mrs....Here you go lovely fans! <3
It just so happens I recently did my first ever craft fair soon and I needed displays for my jewelry. I don't want to do the normal black velvet stands {not judging or talking them down at all}. I want to stand out and make an impression but I am short on cash and trying very hard to stick to a strict budget! So, I've taken to hitting local thrift stores for cool things to use! One thing I found was an empty wooden frame for 50 cents. I loved it - didn't know what I was going to do with it but I loved it just the same! Well, one of my bloggy bff's shared a post about a friend's show at the Queen Bee Market this year - what an amazing display! You have to go and check out her blog posting about her experience and display - Just.Lovely.Things. She also took pictures of other displays during the market which was so helpful! This is when I found what I would be doing with my empty frame!
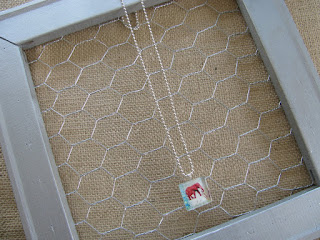
I am going to make a Funky Chicken Wire Frame! Cool, right!?!
I don't know if she made hers or bought it but it is such an awesome idea!
Here is the list of items I used:
Empty Frame (50 cents)
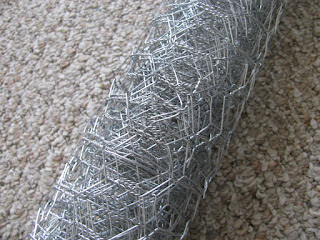
Chicken Wire ($6 but if you want to make more you will have extra OR some of you might have access to spare wire)
Staple Gun & 1/4" staples ($12.50)
Wire cutters (Had on hand but if you don't they are so cheap at Walmart, Michaels, etc)
Paint (Had on hand but again you can pick a small tube of craft pain up for less than $1 and have some left over)
STEP 1 -
**I would suggest painting the frame first to avoid getting it on the wire unless it is already your desired color. I had alreay painted mine silver before deciding to make a tutorial.**
Roll the chicken wire out (kind of like wrapping paper) and lay the frame on it.
STEP 2 -
Using the wire cutters, cut around the frame as closely as possible. It does not have to be hidden just yet. You will be able to clean it up easily once it is stapled.
STEP 3 -
Roll up the remaining chicken wire and set aside.
Flip the frame over and place the chicken wire on top, where desired.
STEP 4 -
Carefully, staple down the chicken wire with the staple gun. I stapled every one so there would be no pop up wire which could result in injury.
Using the wire cutters, clip the excess wire off so none is sticking out and it is laying as flush to the fram as possible. You're done! :)
I may use mine for rings or necklaces. Just.Lovely.Things uses hers for hair clips! So neat! Hope you enjoyed and if you tweak this or make one of your own please share it with us!
Hope you enjoyed and if you tweak this or make one of your own please share it with us!Thanks again for having me!
Peace, Love, & Rock n Roll - Tricia L


